ASSSS Technology Development

Introduction
This game is certainly nothing groundbreaking.
But I used the game jam to force myself to learn some new technology which will help me along my game development journey. Here I will talk about many of the technologies I learned and used to create the elements found in this game. Some elements are not easy to appreciate but still took a long time to develop.
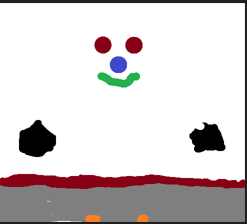
1. Model building and loading. I had learned through the very popular learnopengl.com web site about model loading. There is a whole chapter dedicated to this topic. The recommendation was to use the ASSIMP library which is very comprehensive. I felt somewhat overwhelmed by this because I didn't really know what was going on behind the scenes. So I instead opted for something I had control of and another tool I had used in the past for some design was the OpenSCAD program. This tool will output an STL file which is simply a mesh. There is another python library that will read this file called Numpy-STL which I used to help read in all the vertices. Those vertices were written to a simple file I could import into the program when running on a web platform. If you are aware of the elements found in a model file, you will note that each vertex in a model file will have other attributes, most notably texture coordinates attached to them. This STL file is void of that type of information making use of this file format unfortunate. But instead of giving up I thought of a way I could still map a texture to the model.
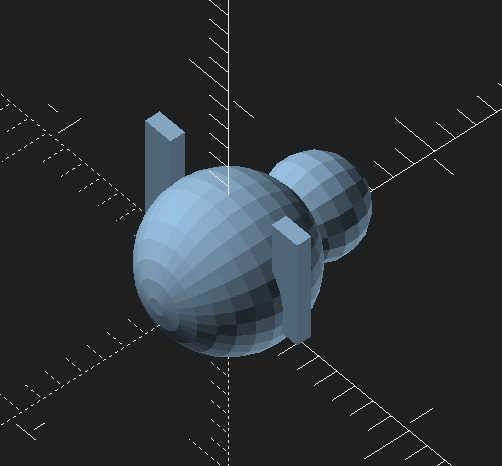
You can see in the image below the snowbot, as I call it, laying on its back with the Y axis protruding from its head. The snowbot is scaled to fit within the -0.5 to 0.5 coordinate space in X and Y. This is important. We use the X,Y coordinates from the vertices as UV coordinates for the image. This will color the snow bot as if the texture map was a solid color on the Z axis. It will make the snowbot appear the same color on the front and back at the same time. Another feature of this model is that the snowbot is sunk into the Z axis. The Z axis is used to darken the colors of the model so that colors in the back are essentially black. Here is the coloring code:
out_color = vec4(texture(Texture1, v_uv3.xy + vec2(0.5,0.5)).rgb*max(v_uv3.z,0.0),1.0);
Here the texture map named "Texture1" is sampled by the v_uv3 coordinate which is just the xy coordinates of the vertex after offsetting by 0.5,0.5 to move it to with the 0,1 space of UV coordinate space. The result is multiplied by the Z coordinate which is a number no smaller than 0.0.
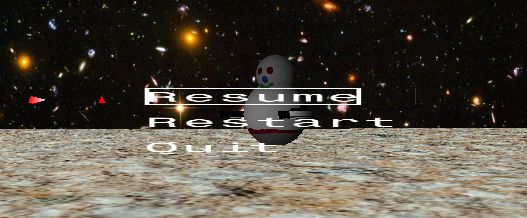
2. Menu Display
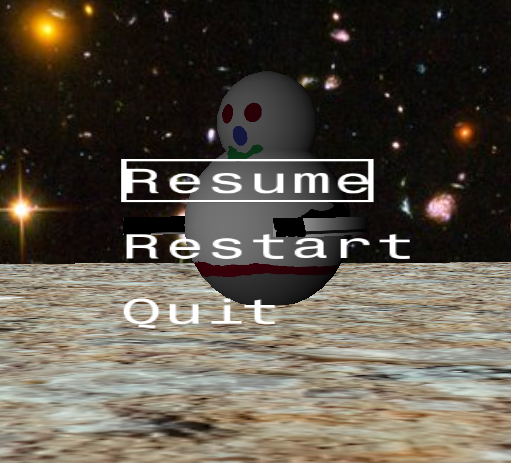
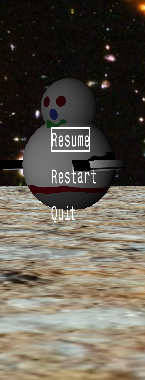
For a short while I tried to get Dear GUI working as well as pygame-GUI both of which did not work "out of the box" in my webgl setup enabled by pygbag. So I ended up just creating my own. While I had worked to enable a graphical overlay with this technology on a different project, I was not happy with it because it did not easily scale with the screen resolution. My self developed GUI solution does this for better or worse. Shown in the images below are the menu before and after resizing the screen. Note that the menu keeps the same relative size in X and Y compared to the screen size enabled by opengl sampling technology.
These menus are enabled by performing the following actions.
- Create a sampling texture that contains the text to be displayed on the screen.
- Create a Quad (two triangles forming the rectangular menu area) with UV coordinates pointing to the sampling texture
- Run the shader pipeline whenever the menu mode is enabled.
Note that to make this possible I capture window resize events and regenerate all pipelines upon that action. This is required because the viewport has changed size and the pipelines cannot be dynamically altered (or I do not know how to do this).
3. Like the menu, I also created an on screen overlay graphic (the crosshair) using the identical technology as the menus.
4. Learned how to create a skybox. But it uses the same image for all 6 sides. Need to find or make some other graphics to fix this.
5. Learned how to create a floor
6. Learned how to implement FPS elements like jumping, gravity, moving around.
This item was not completed correctly however. You can notice that when looking up and jumping, you can go much high than if you look down and jump. The vertical movement component is getting into the jump and should probably be eliminated or at least reduced.
There are many other items on my list that were not completed.
- Two more enemies were constructed in OpenSCAD but were not put into the game
- Something is wrong with the sound, too many samples playing simultaneously is causing some samples to not play.
- The player can walk off the floor area. Need to limit them so they are trapped on the floor.
- Add a score. This will use the same technology as the menus.
- Make defined levels and make them progressively harder.
- Add more weapons.
- Add an explosion when enemies are killed. (Some expanding spheres should be pretty easy).
Leave a comment
Log in with itch.io to leave a comment.